This script allows you to change the default contextual marking menu in Maya.
Andrei Rădoi, Senior Environment Artist in AMC, created this script to enhance the efficiency of your modelling works and for customising your tools so as you can find it easily.
Installation:
Automatic (just for Windows)
- First, close Maya if it’s already open.
- extract amc_RO_Studio_marking_menu_wizard.zip on your PC
- double click on amc_install.bat
And this is it.
Manual
- extract amc_RO_Studio_marking_menu_wizard.zip on your PC
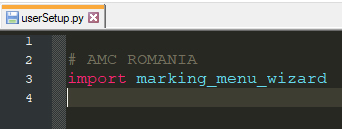
- find your Maya user scripts (C:\Users\\Documents\maya\2018), from amc_RO_Studio_marking_menu_wizard copy prefs and scripts folder in your maya\2018
- in the maya\2018\scripts create a text file and rename userSetup.py. If already exists, you open and type this: import marking_menu_wizard
Congratulations! You finished installing the marking menu wizard!

Now, open Maya and you will find this:
This is the AMC shelf and the first button. Other buttons will follow on this shelf.

The AMC button it’s a toggle between marking menu wizard and default Maya marking menu.
If AMC logo is red means marking menu wizard is active.
If AMC logo is gray means default marking menu is active.
All custom contextual marking menu looks like the default marking menu. It’s your choice how do you change them.
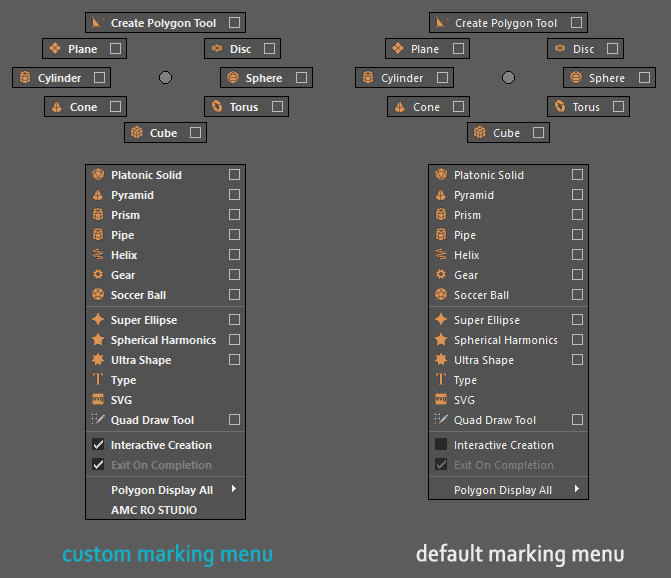
To ease the difference between personalized and implicit we made a small change. Custom marking menu has a bold font and AMC RO STUDIO button.
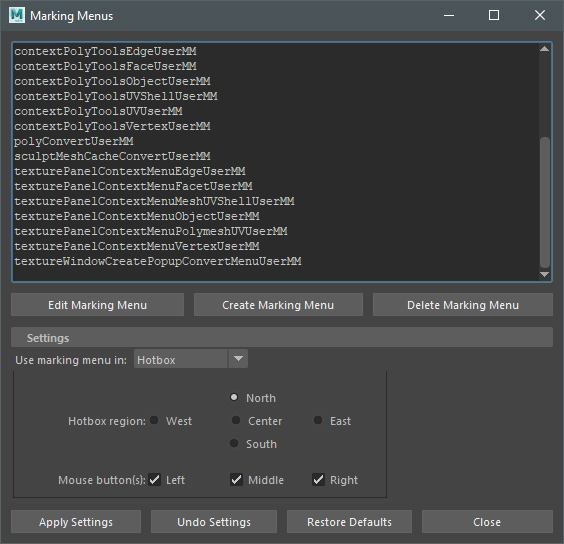
If you want to change it go to Windows -> Settings/Preferences -> Marking Menu Editor
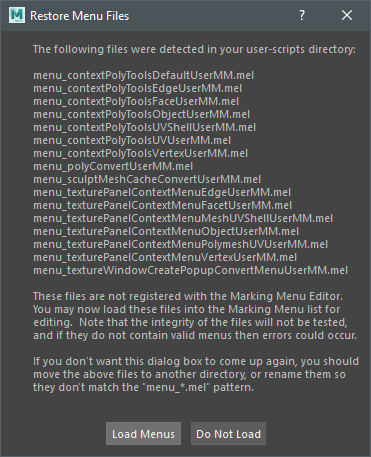
For the first time when you open Marking Menu Editor it shows this window:
Press the Load Menus and it will show the Marking Menus.
Very important, do not rename any of the marking menus!
Now you can change any button on your marking menu. To see in viewport your modification, just modify the selection (select or deselect one or more object).
That’s it.
Andrei Rădoi, AMC Senior Environment Artist